One of the most challenging parts of writing a thesis or academic article is keeping your sources organized and accessible. During the research process, dozens or even hundreds of articles may be read. However, when it’s time to cite, it can be difficult to remember where each piece of information came from. PDF files scatter across the desktop, and compiling a bibliography can result in significant time loss.
In this article, I will explain step-by-step how to use Zotero, a free and open-source reference management program, to streamline your academic work—especially when collaborating as a team using shared libraries.
What is Zotero? Why is it Necessary?
Zotero is a reference management tool that simplifies storing, organizing, citing, and automatically generating bibliographies during the academic writing process. Here are some advantages of using Zotero:
- You can add sources to your digital library with a single click.
- It automatically adjusts to the citation styles of different journals.
- You can create shared libraries for group work and collaborate as a team.
- It helps keep PDFs organized and strengthens your personal archive with tags and notes.
Step-by-Step Guide to Using Zotero
1. Installation and Basic Settings
To start using Zotero, follow these basic steps:
a. Download the Desktop App:
Go to https://www.zotero.org/download and download the Zotero desktop application suitable for your operating system.
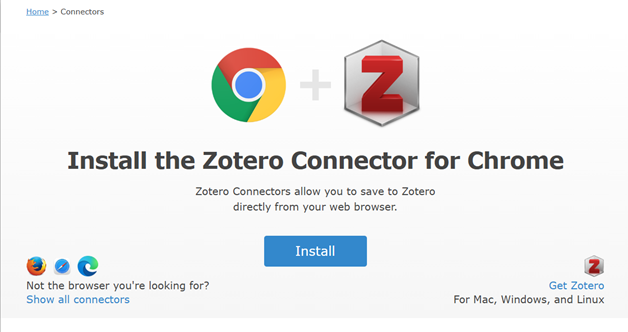
b. Install the Browser Extension:
Zotero Connector is a browser extension compatible with Chrome and Firefox. For the Chrome extension:
https://www.zotero.org/download/connectors
With this extension, you can add articles you find while browsing the web directly to your Zotero library with one click.
c. Create a Zotero Account & Enable Sync:
Create a free account at zotero.org. In the application, go to Settings > Sync and link your account to enable automatic synchronization across devices.
Tip: Zotero supports various citation styles. You can go to Settings > Citation > Cite Styles and easily add styles such as APA, IEEE, or Chicago. (Details about citation styles and bibliography formatting will be covered in a future post.)
d. Zotero Word Plugin Installation and Use:
When you install Zotero, the Microsoft Word plugin is usually installed automatically.
To check or reinstall it, follow these steps:
- Open Zotero
- Go to Edit > Preferences > Cite > Reinstall Microsoft Word Add-in
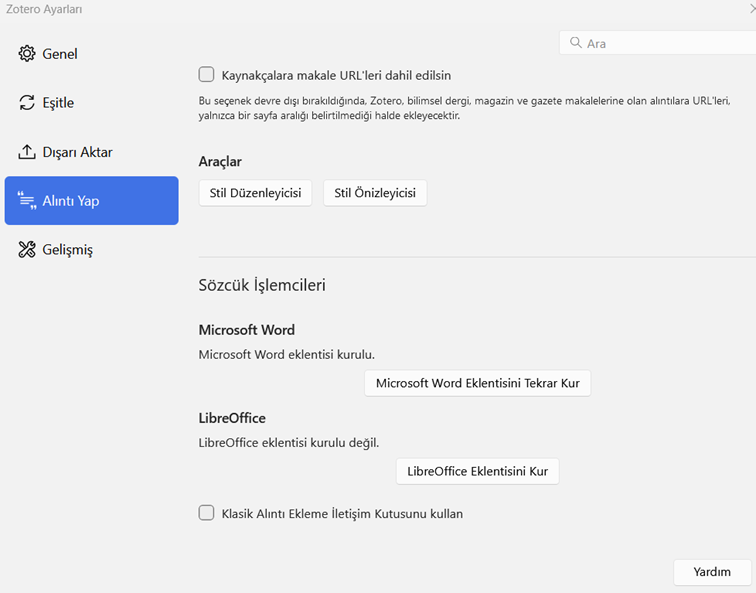
- Here, you can check whether the “Microsoft Word Add-in” is installed.
- If it’s not installed, you can manually install it with a single click.
When you open Word, the Zotero tab should appear in the top menu.
Usage:
Once you start writing, you can easily perform the following actions from the Zotero tab in Word.
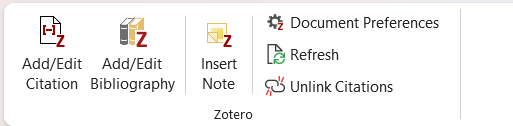
The buttons under the Zotero tab serve the following functions:
- Add/Edit Citation: Place your cursor where you want to insert a citation, click this button, and select the relevant source from your library. Zotero will automatically insert the citation.
- Add/Edit Bibliography: Use this when you reach the end of your document to generate your bibliography. Place your cursor where you want the bibliography to appear and click the button. Zotero will automatically format and insert it according to your selected citation style.
- Insert Note: Adds a note linked to the selected reference into the document. This is especially useful in discussion or literature review sections.
- Document Preferences: Lets you switch between citation styles like APA, IEEE, or Chicago. Zotero updates all in-text citations and the bibliography automatically.
- Refresh: Syncs any changes made in your Zotero library with your document. For example, if you’ve updated an author’s name or publication date, clicking “Refresh” will apply these changes in your Word document.
- ⚠️ Unlink Citations: WARNING! This button removes all Zotero connections from the document. Citations are converted into plain text and will no longer update automatically. This is typically used before submission or when sharing the document with someone not using Zotero. This action is irreversible—make sure to back up your document first!
2. What to Do After Installing Zotero
a. Creating and Naming Collections (Folders)
Once Zotero is installed and basic settings are configured, one of the first things you should do is create collections (folders) to organize your library. Zotero doesn’t just pile everything into a single list—it allows you to separate and manage your sources thematically.
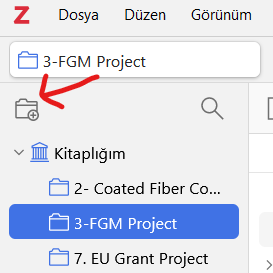
In Zotero, these folders are called “collections.” Creating one is simple: click the folder icon in the top-left corner and select “New Collection.” You can also right-click on any collection to create a subcollection, which helps you build a more hierarchical and logical structure.
How should collections be named?
It’s helpful to name them based on purpose or topic. For example:
- 📚 Thesis – Literature Review: For key sources used in the introduction of your thesis
- 📘 Methods – FEM Models: Technical sources used in the methods section
- 🧪 TÜBİTAK Project – Material Characterization: Literature for a specific project
- 📊 Article Drafts: For ongoing manuscript writing
- 🧠 Reading List – Sustainability: Sources of interest not yet analyzed
Tip: For visual organization, you can add emojis, numbers, or symbols to collection names, like:
- 📁 01 – General Literature
- 📁 02 – Methodology
These visual cues can make browsing a large library easier and more motivating.
b. 3 Ways to Add Sources: A Quick and Clean Start
One of the most important steps in using Zotero effectively is adding sources correctly. This doesn’t just build your library—it also saves time during the writing process.
Zotero offers three main ways to add references:
1. Add with Browser Extension (One Click):
With the Zotero Connector extension (as explained above), you can add an article, book, or news item from the web to your Zotero library with a single click.

Zotero will automatically capture:
- Title
- Author(s)
- Publication date
- DOI number
- PDF (if available)
Just click the Zotero icon in your browser toolbar. This method is especially useful for quick literature reviews.
2. Add Sources Manually:
Some materials—especially older publications or custom documents—may not support automatic metadata extraction. In such cases, Zotero offers manual entry.
Click the green “+” (New Item) button in the top-left and choose from the following types:
- Book
- Article
- Thesis
- Web Page
- Report
- Patent, etc.
Fill in the relevant fields (author, title, year, journal name, page number, etc.). You can also optionally add PDFs, notes, or tags. Manual entry is essential for accuracy and is recommended for special sources.
3. Adding PDF Files via Drag-and-Drop
If you already have downloaded PDF articles on your computer, you can simply drag and drop them into the Zotero window.
Zotero will scan the content of the PDF and attempt to automatically identify:
- The title
- The author(s)
- The publication year
Based on this, it creates a reference entry. It may not always be 100% accurate, but with minor corrections, it’s a very practical solution.
4. Importing References from Google Scholar via RefMan (.ris) Files
Another effective and reliable method for adding sources to Zotero is by downloading .ris format reference files (RefMan) from Google Scholar. This method is particularly useful when the browser extension isn’t functioning properly or when you need to transfer multiple sources.
➤ How to do it:
- Go to https://scholar.google.com.tr
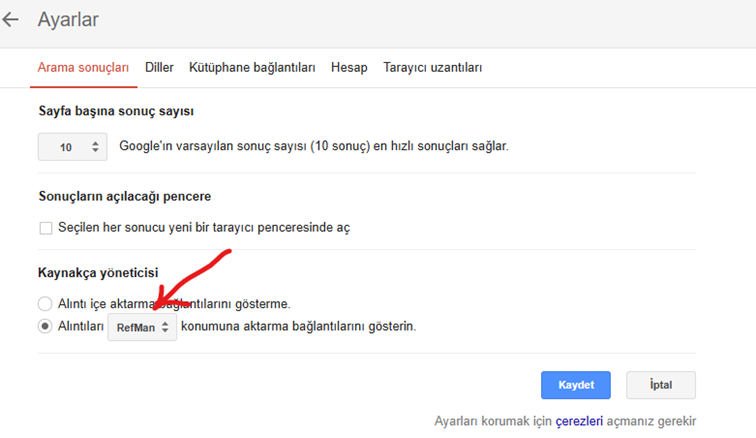
- Click the three-line menu icon in the upper left, then select “Settings”

- Under the “Bibliography Manager” section, you’ll see the option for citation format
- Select “RefMan” as your preferred format and save the settings
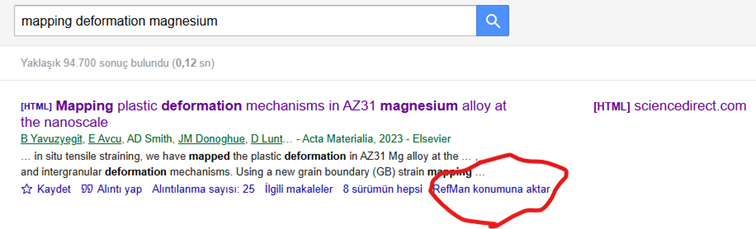
Now, when you click the RefMan link under any search result, a .ris file will be downloaded to your computer.
If Zotero is installed and properly configured, double-clicking this .ris file will:
- Open Zotero automatically
- Recognize the reference metadata
- And directly add the publication to your library
No extra steps are required.
4. Enriching Your Library with Tags and Notes
One of the most important requirements for productivity in academia is not just reading, but being able to take structured notes and access them quickly when needed. This is where Zotero’s note-taking feature becomes an indispensable tool for researchers.
Zotero doesn’t just store references; it allows you to add personal notes to each item, group them, and integrate them into your writing process. And the interface is highly user-friendly.
To add a note in Zotero, first select the relevant item. Then, in the right-hand panel, go to the “Notes” tab and click the “Add Note” button. You can easily write summaries, important quotes, or personal comments about the source. These notes are like a digital notebook—editable, titled, and stylable (bold, italic, etc.). This way, you don’t just collect information; you process and retain it.
Zotero also offers standalone notes, which are not linked to a specific source. These are great for general ideas, to-do lists, or thematic outlines. You can organize them by dragging them into different collections.
Even more practical is the ability to insert these notes directly into your documents using the Zotero Word plugin. With the “Insert Note” command, notes linked to references can be added to your text—particularly helpful in literature review sections. The notes you collect during research can be transformed into text with just one click.
In summary, Zotero’s note-taking system supports not only storing knowledge but also producing it. Especially for graduate-level research, having consistent, accessible, and structured notes accelerates the writing process, deepens critical thinking, and reduces the need to reread. This feature elevates Zotero beyond a basic reference manager and turns it into a personal academic knowledge assistant.
5. Creating a Group Library: Expanding Zotero for Team Collaboration
Working Without PDFs in Group Libraries
Zotero’s group library feature is a powerful tool that facilitates source sharing and collaboration in academic projects carried out as a team. However, there is one important limitation to keep in mind when working with group libraries: storage space.
The free version of Zotero offers 300 MB of cloud storage, which can fill up quickly as PDF files are uploaded. In projects with multiple members or large-scale literature reviews, this can limit the functionality of the group library. For this reason, many researchers prefer to work without attaching PDF files, relying only on reference metadata.
This method is highly practical. All bibliographic information—such as the title, author(s), publication year, and journal name—is added to the Zotero group library, but the PDF itself is not. This way, group members can see which sources are being used, add notes and tags, and, if needed, examine the material further in their own libraries.
Each team member can download the PDFs they need to their own computers and store them in their personal Zotero libraries. This approach both conserves cloud storage and serves the organizational purpose of the group library: to build a shared literature pool.
This method is especially ideal for:
- Teams with limited cloud storage
- Individuals who use the same source for different purposes (each can take their own notes)
- Groups sharing suggestions, reading lists, or scan-level literature reviews
Moreover, Zotero provides all reference management functions even when no file is attached: citing, generating bibliographies, note-taking, and tag-based filtering all still work seamlessly.
So, how do you set up this system? Here’s a step-by-step guide:
a. Create or Join a Group Library
First, log in to your account at https://www.zotero.org.
Go to the “Groups” section, where you can either create a new group or accept an invitation to join an existing one.
When creating a group, it is recommended to select “Private Membership.” This means the group will only be visible and editable by invited members.
This is the most secure and commonly used option for academic teams.
b. View Your Group Library in the Zotero Desktop App
Once you open the Zotero desktop application, your group will appear under the “Group Libraries” section in the left-hand panel.
Just like in your personal library, you can create collections (folders) within the group and organize references accordingly.
c. Do Not Attach PDF Files When Adding Sources
To add a reference to the group library, you can use one of the following methods:
- Use the Zotero Connector browser extension to capture reference information from a webpage without attaching the PDF
- Use “New Item” in Zotero to manually enter reference details
- Download a .ris file from Google Scholar and import only the citation data
⚠️ Note: How to Remove an Automatically Attached PDF
Sometimes, Zotero may automatically attach a PDF to a reference. If this happens and you want to keep only the citation:
- Click on the gray PDF entry below the reference (select the PDF, not the parent item)
- Right-click on the PDF
- Select “Move Item to Trash” from the menu
- This will delete only the PDF file, leaving the reference intact
📌 Be sure you’ve selected the correct item. To avoid accidentally deleting the entire reference, make sure only the PDF line is highlighted.
d. Inform Group Members: Everyone Should Store PDFs in Their Own Library
If the group has decided not to host PDFs in the shared library, it’s important that all team members follow this guideline.
You can add brief notes to references, such as:
“⚠️ No PDF attached – please add to your personal library if needed.”
This way, each member can take their own notes, store the file in their own folders, and download the PDF individually if required.
e. Disable the Automatic PDF Download Feature (Optional)
If you prefer not to attach PDFs by default, you can disable this feature in Zotero’s settings:
- Open Zotero
- Go to Edit > Preferences > General
- Uncheck the option “Automatically attach associated PDFs when saving items.”
This setting prevents Zotero from downloading and attaching PDFs when you add references from your browser.
Conclusion
Zotero is a powerful tool for anyone who wants to manage references efficiently and collaborate effectively in academic writing.
In this guide, we covered the essential functions of Zotero—from installation and reference management to notes and group libraries.
Next Article
In the next post, I’ll explain how to collaborate in real time with multiple people on the same document using Microsoft Teams. Stay tuned!